
The DemandSense tracking code (pixel) is unique to each client and is generated automatically when a DemandSense account is created. You can find your tracking code on the Tracking Code page within the platform.
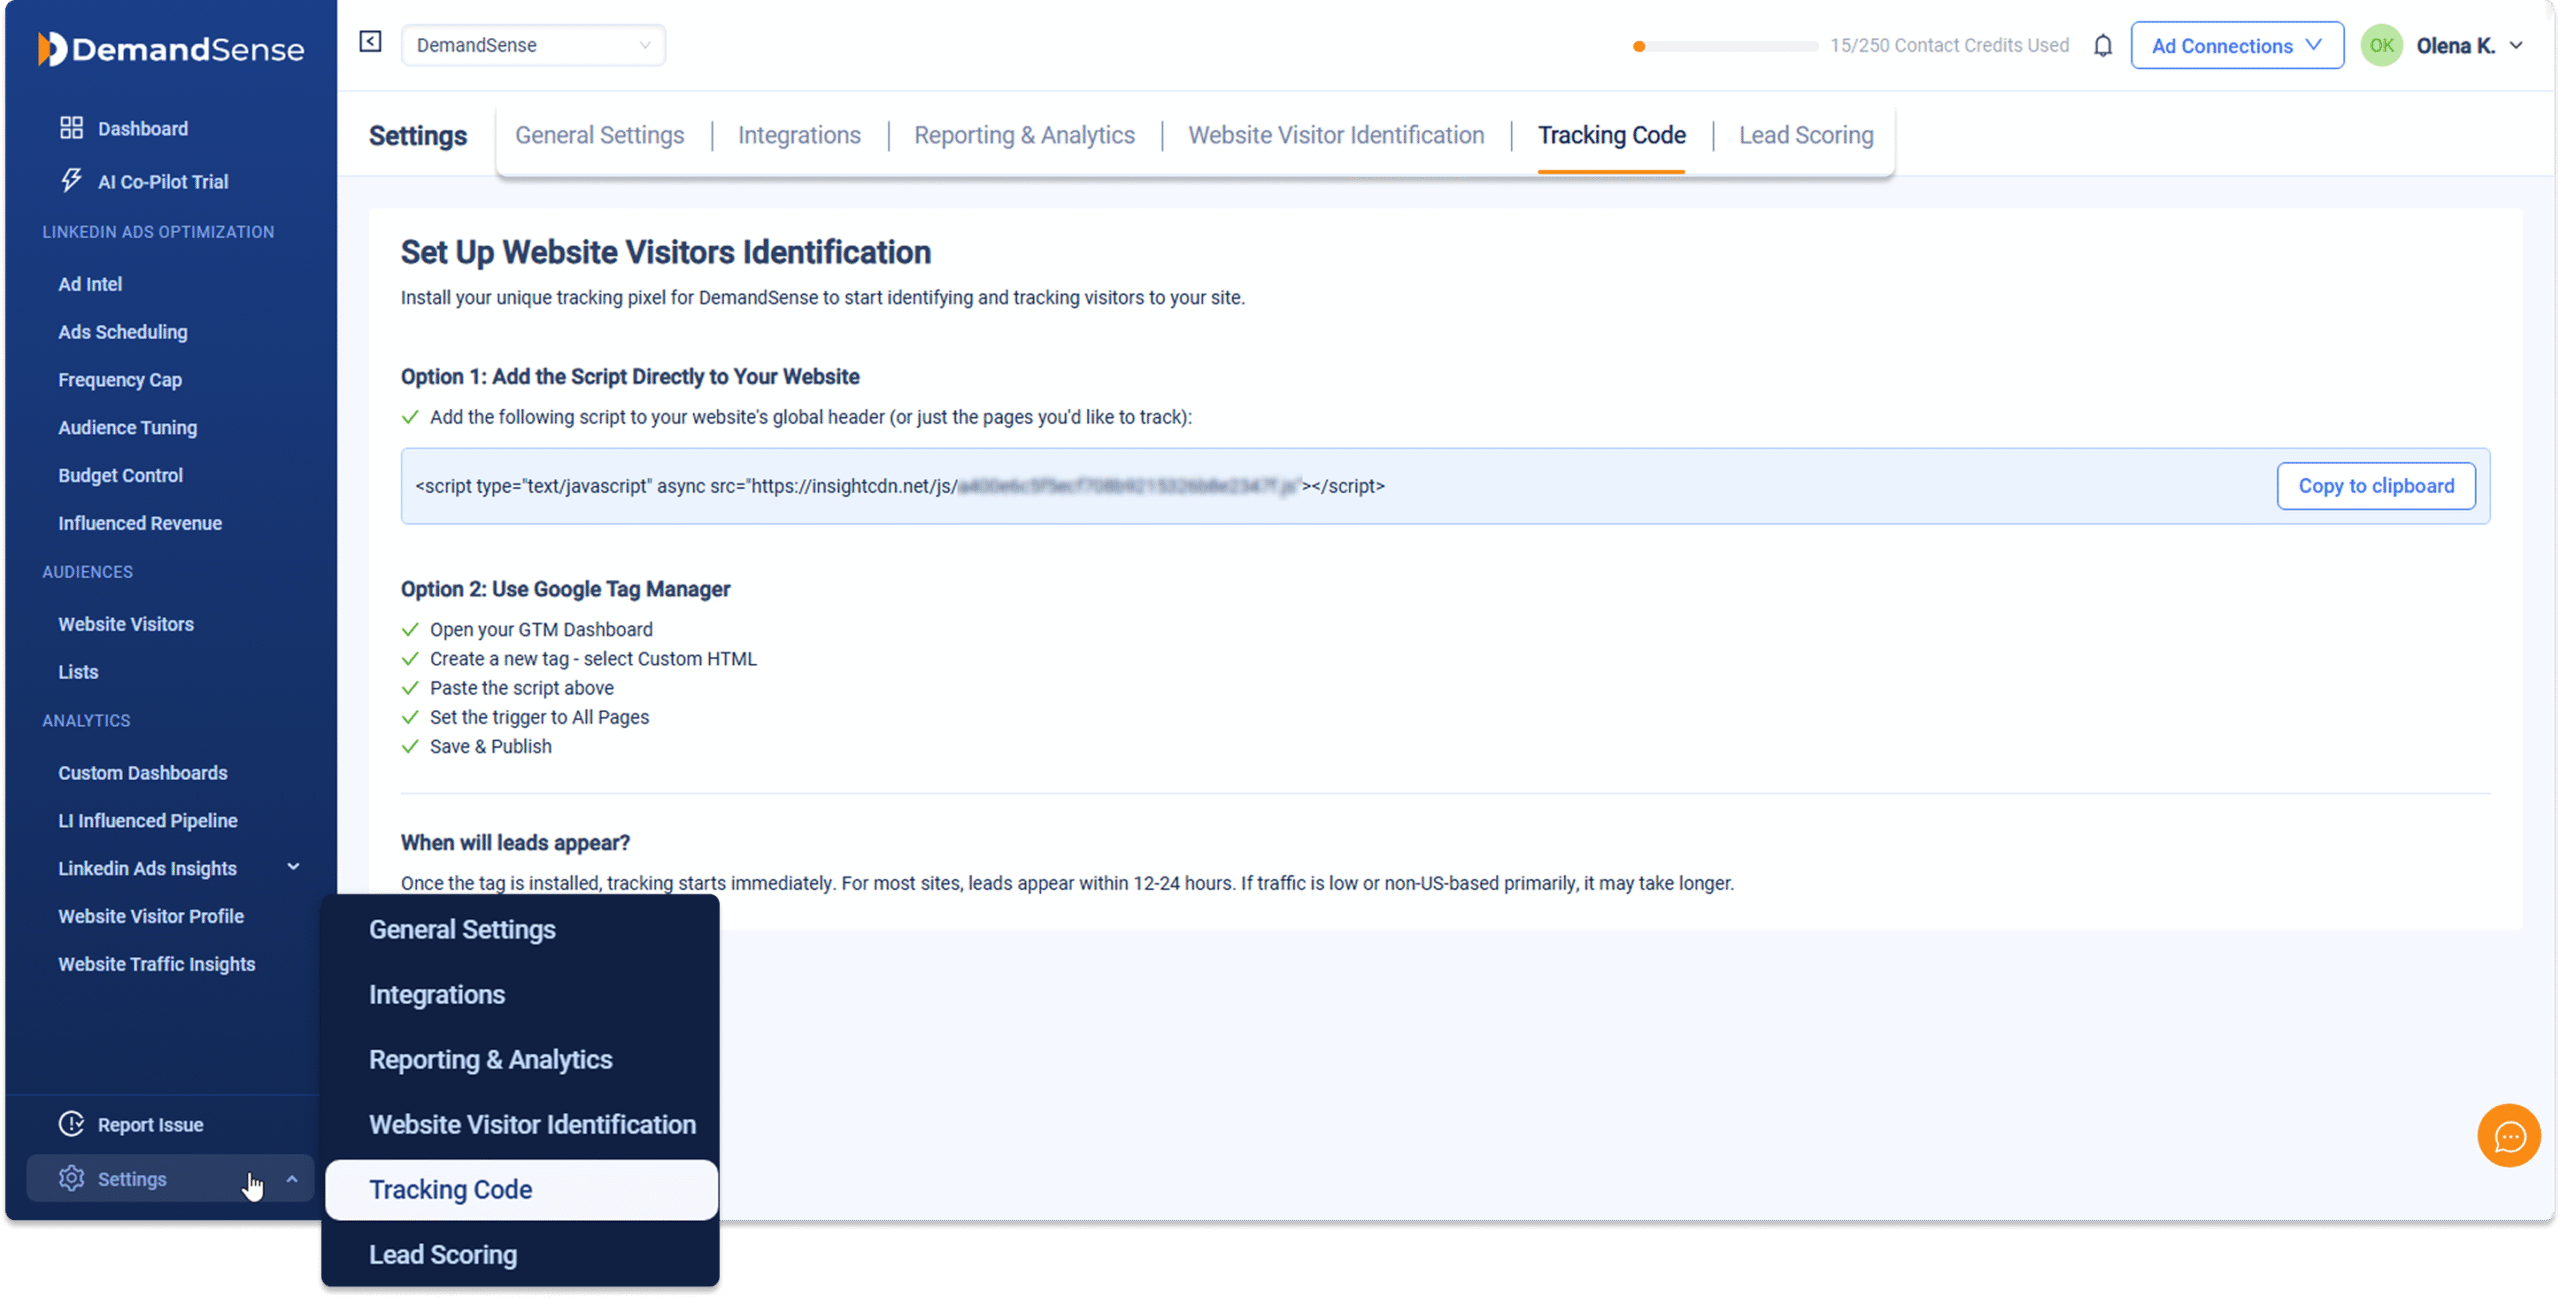
Once the tracking code is installed on your website, DemandSense starts tracking traffic immediately. For most websites, the first leads appear within 12–24 hours. Websites with low traffic volume or primarily non‑US traffic may take longer.
How the Tracking Code Can Be Installed #
You can install the tracking code in one of the following ways:
- Global header – tracks traffic across the entire website
- Specific pages only – tracks traffic only on selected pages
- Google Tag Manager – allows deployment without changing the website code directly
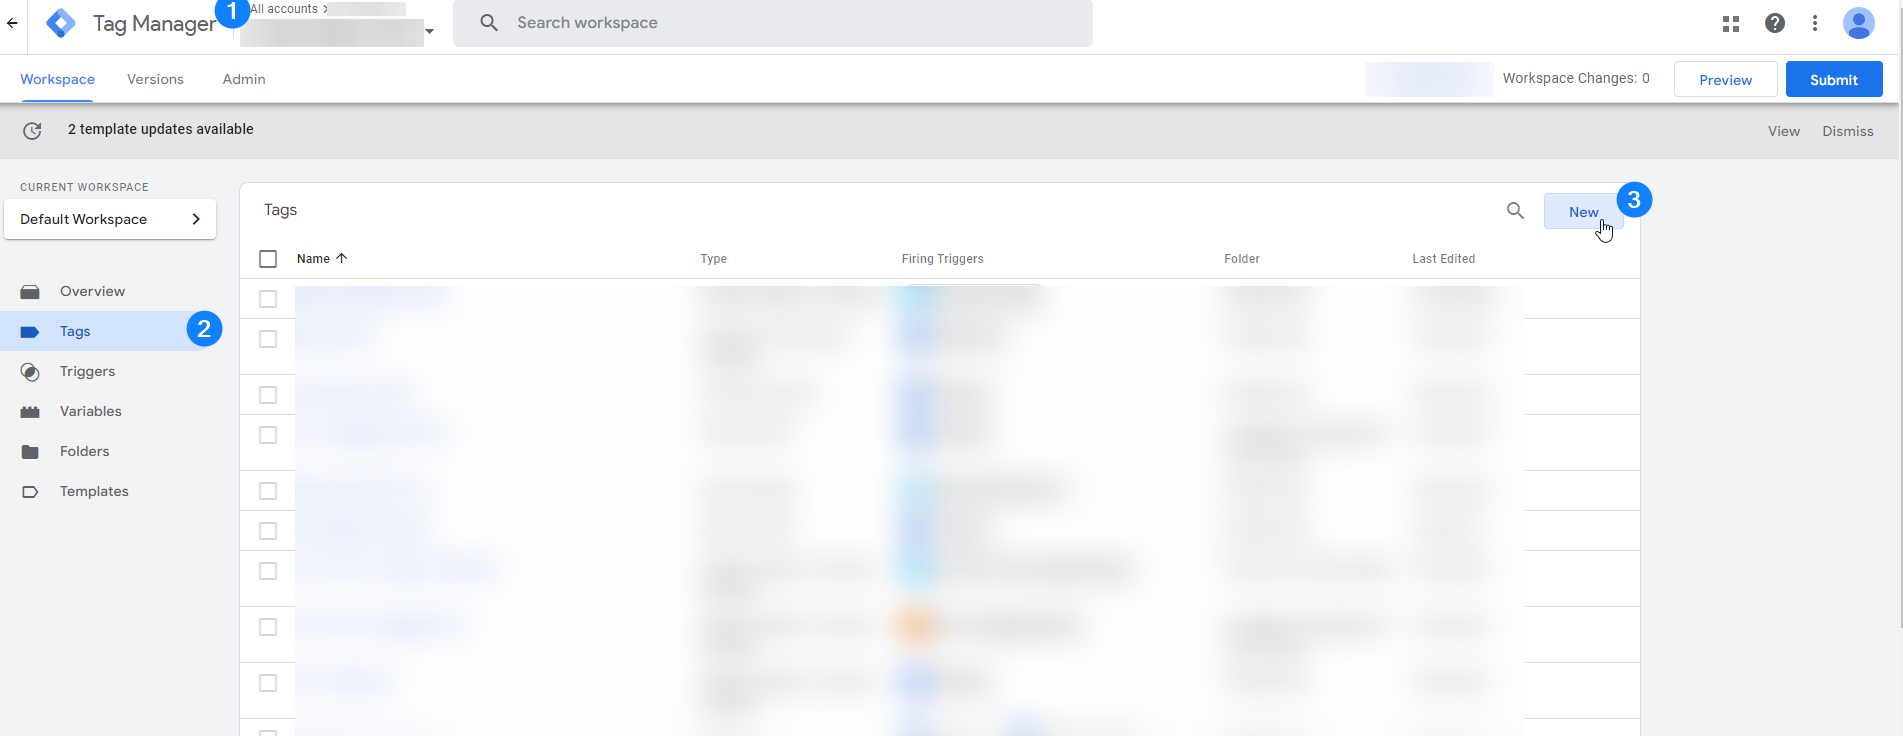
Here are the exact steps for GTM installation:
- Go to your Google Tag Manager Console.
- In the left-hand menu, click Tags.
- Click New.
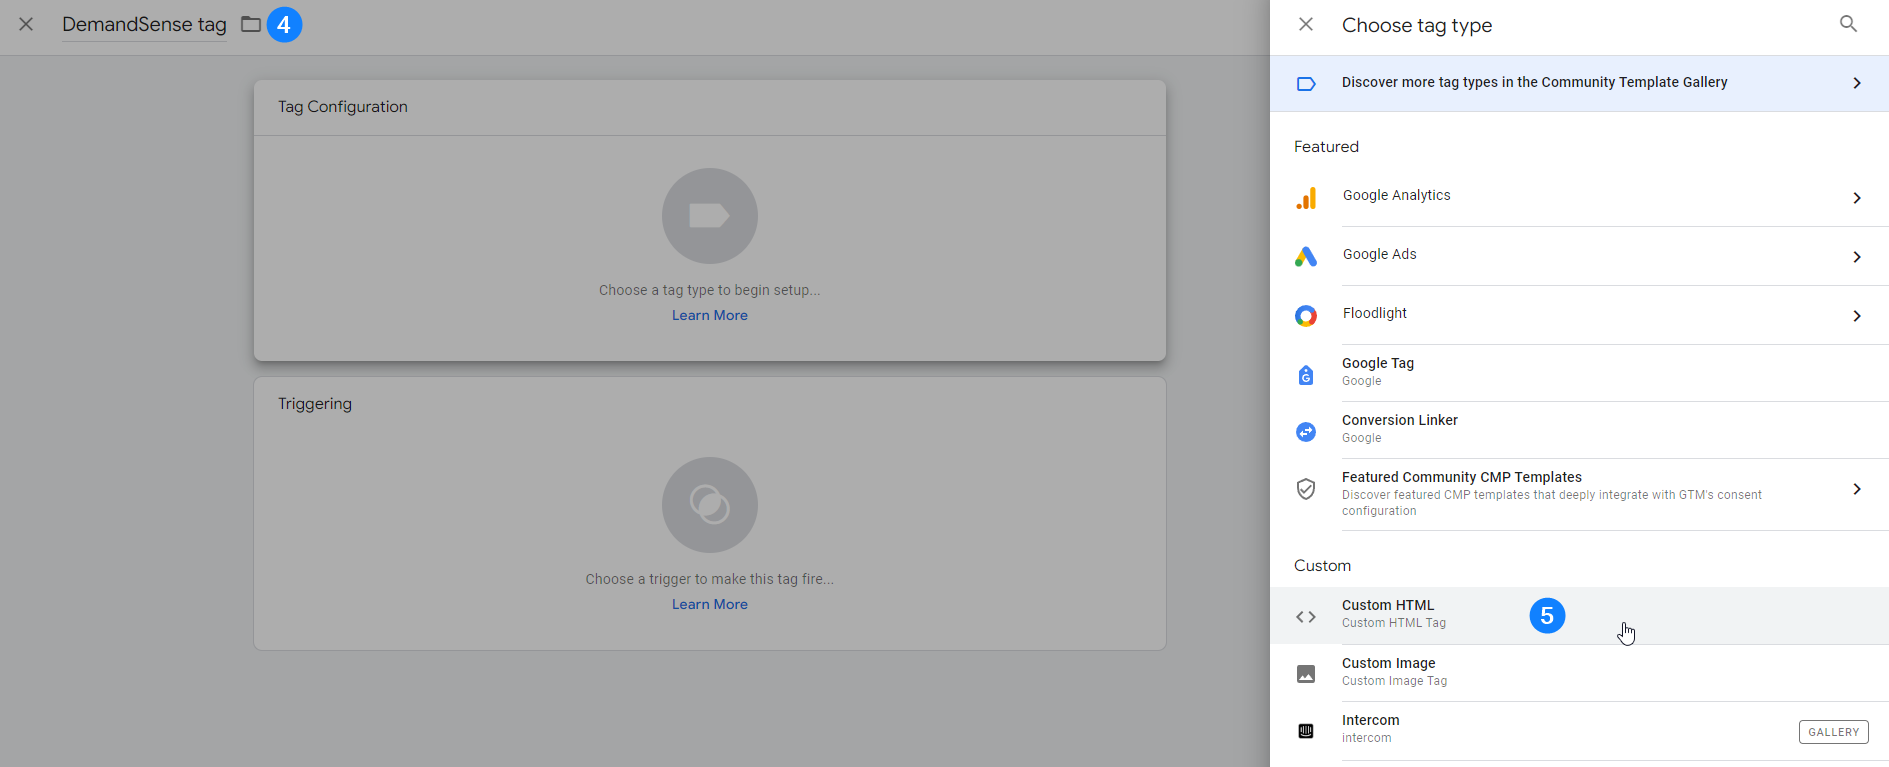
- Enter a name for the tag (for example, DemandSense Tracking Code) and click Tag Configuration.
- When selecting a tag type, choose Custom HTML.
- Paste the DemandSense tracking code into the Custom HTML section.
- Click Triggering and set the trigger to All Pages.
- Click Save in the top-right corner.
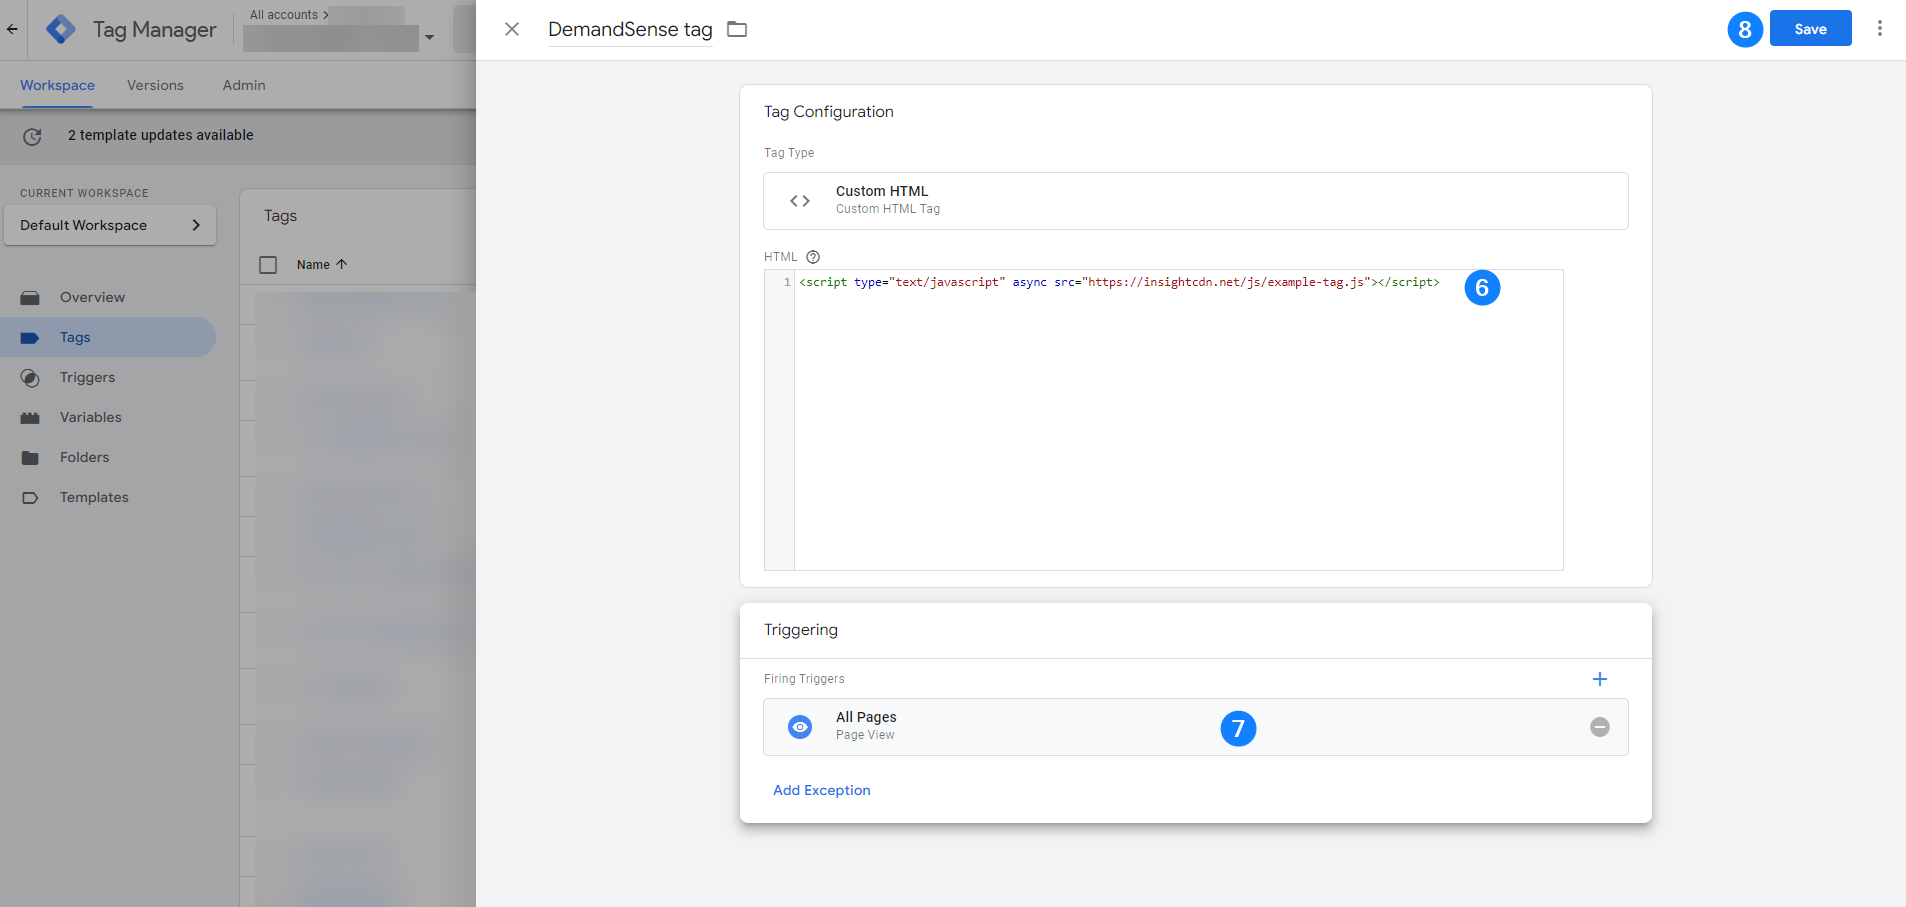
- Click Submit in the top-right corner to publish the container.

Troubleshooting #
If you do not see data after installation, check the following:
- The correct Google Tag Manager container is published
- The tracking code in GTM matches the code shown on the DemandSense Tracking Code page
- At least 24 hours have passed since installation
If issues persist after completing these checks, contact the DemandSense support team for assistance.