
Audience Explorer lets you build precise, targeted lists of B2B prospects quickly and easily. Apply powerful filters to find the right people and companies, preview results, unlock verified contact details (emails and phones), and save prospects to lists ready for nurturing campaigns or digital ads.
How to Access and Start Using Audience Explorer #
Look for Audience Explorer in the main menu under the AUDIENCES section (directly below Website Visitors). When you open it for the first time, you’ll see an empty state along with the filters sidebar on the left. The filters sidebar stays permanently open on the right side, giving you constant access to refine your targeting.
Setting Up Your Filters #
At the top of the sidebar, select one of three methods:
- Set filters manually—Pick this option to build your search from scratch using the available fields.
- Import LinkedIn filters—Pull settings directly from an existing LinkedIn campaign or audience (great if you already have good targeting there).
- Use previously saved filters — Load a filter set you created and saved earlier.
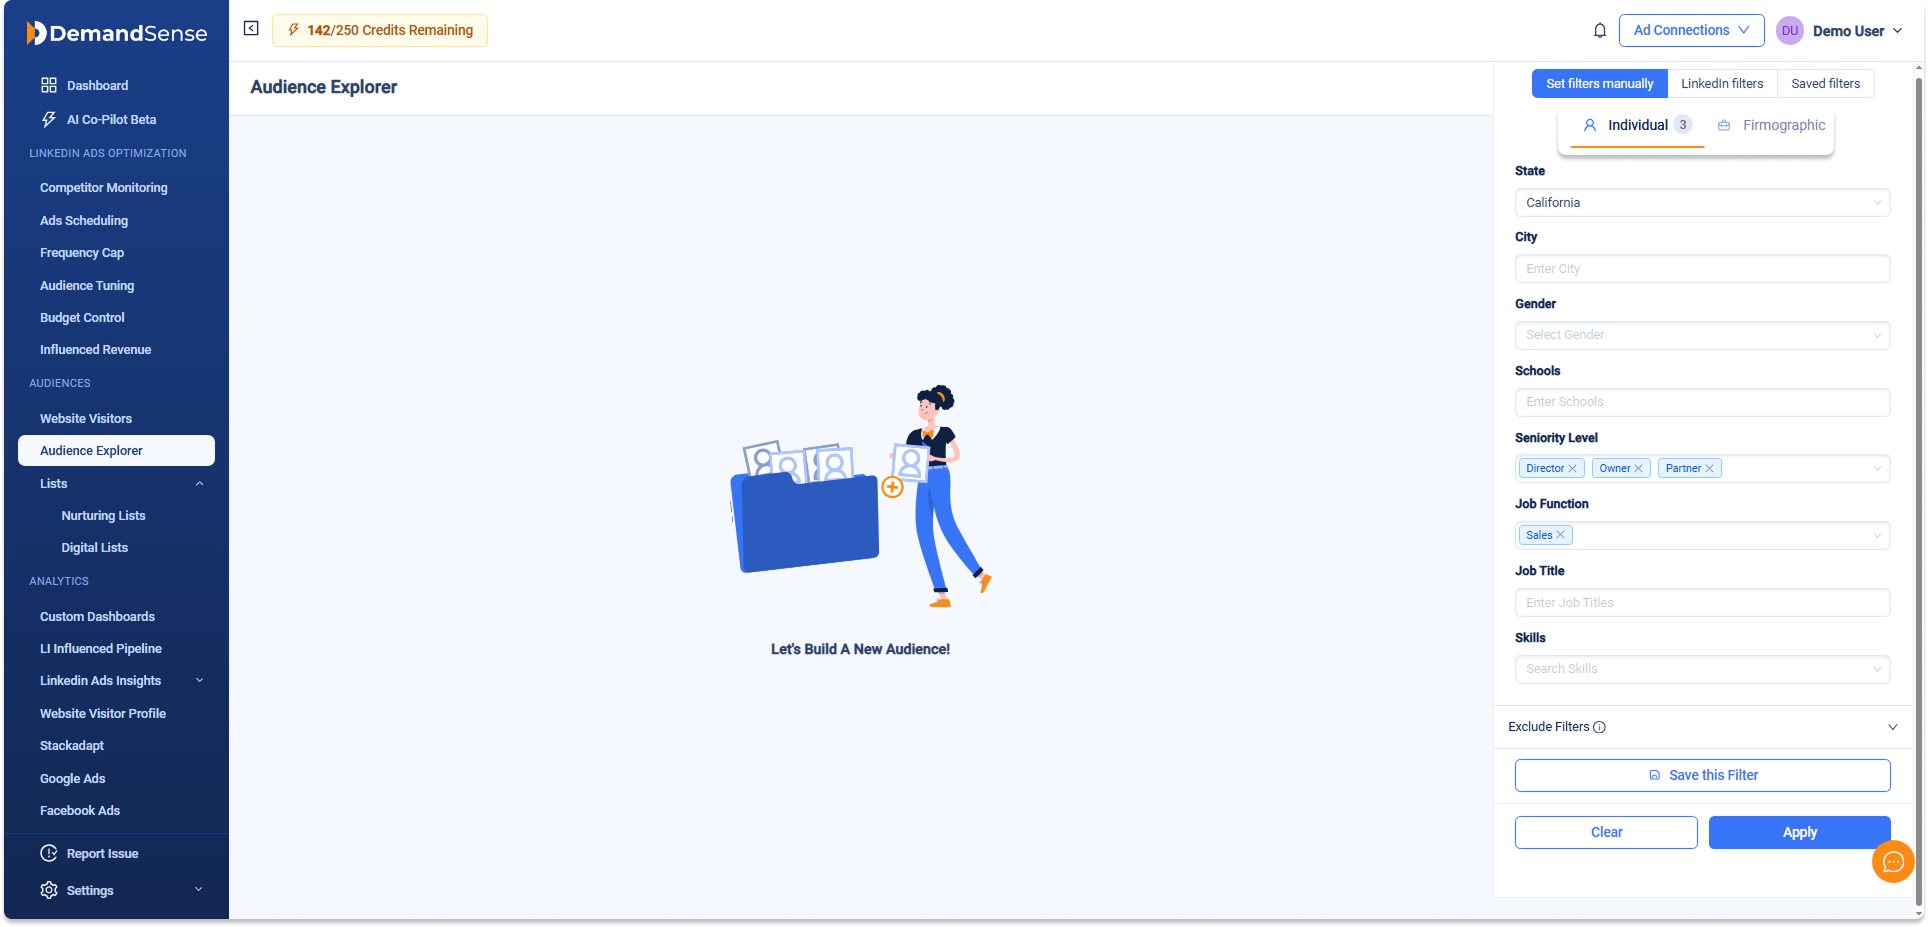
Switch between the Individual tab (persona-based details) and the Firmographic tab (company-based details). Individual filters include state, city, age, gender, education (schools and degrees), seniority level, job function, job title, skills, and more. Firmographic filters cover account name, revenue ranges, industry (with enhanced precision), and employee size bands.
Most filters let you pick multiple options, and there’s a search box inside each one so you can quickly find what you’re looking for (for example, typing to locate a specific job title or skill).
If you build a useful combination, click + Save this Filter to store it for later. Saved filters appear when you choose the “Use previously saved filters” option.
At the bottom of the sidebar, you’ll also find an Exclude Filters section (collapsible with a small info icon ⓘ). You may use those exclude filters when you wish to omit specific attributes from your selection.
When you’re happy with your choices, click the blue Apply button. Or use Clear (white button) to reset everything back to empty.
Importing Filters from LinkedIn
Switch to the LinkedIn filters tab. If you haven’t connected your LinkedIn Campaign Manager account yet, you’ll see a prompt with a Connect button that leads to the ads scheduling setup.
Once connected, select either “LinkedIn Campaign Name” or “LinkedIn Audience Name,” then type to find and pick the one you want. Click “Continue” to import. The imported filters load automatically, and the campaign or audience name shows at the top of the sidebar. You can tweak them before applying or save the set for future use.
Loading saved filters
On the Saved filters tab, pick any previously saved combination from the list. It loads instantly, ready for tweaks or direct application.
Building Your Audience #
Once filters are applied, Audience Explorer creates your list. You’ll see a loading message: “Your audience is building. It might take a little while.”
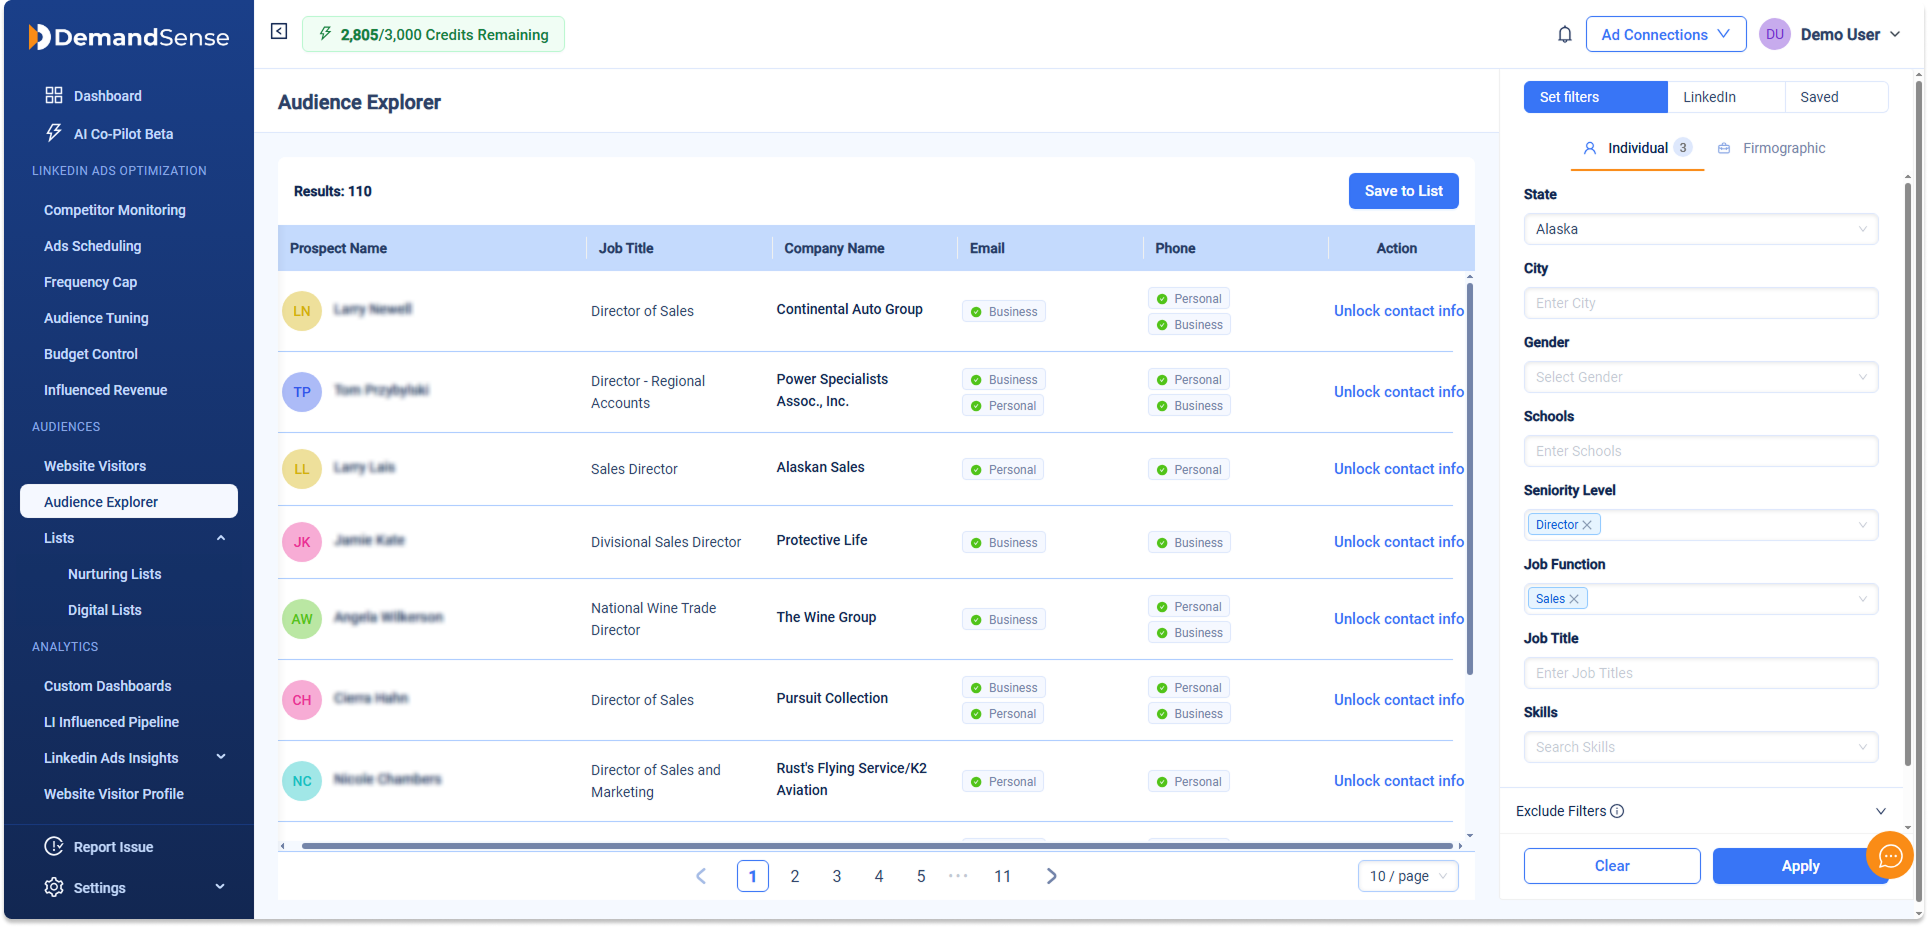
When it’s ready, prospects appear in a table with these columns:
- Prospect Name
- Job Title
- Account Name
- Phone
All contacts start out locked (similar to the LinkedIn Connections view). The total number of matches is shown above the table. If you try to leave the page while an audience is ready, a pop-up asks, “Do you want to exit? Your filters will not be saved.” Choose Cancel to stay or Leave to go (but filters won’t carry over—next time you open Audience Explorer, you’ll start fresh).
Unlocking Contact Details #
Click Unlock on any row to reveal that prospect’s full email and/or phone number. Each unlock costs 0.25 credits.
A success message confirms that the unlocked contact is automatically added to the default Revealed Contacts list (with a direct link to view it). Unlocked details remain visible in the current table until you refresh the page or navigate elsewhere.
Only single unlocks are supported here—no bulk option in Audience Explorer.
Saving Prospects to a List #
Once you have results (and any unlocks you want), click Save to List to open the wizard. The wizard walks you through three simple steps:
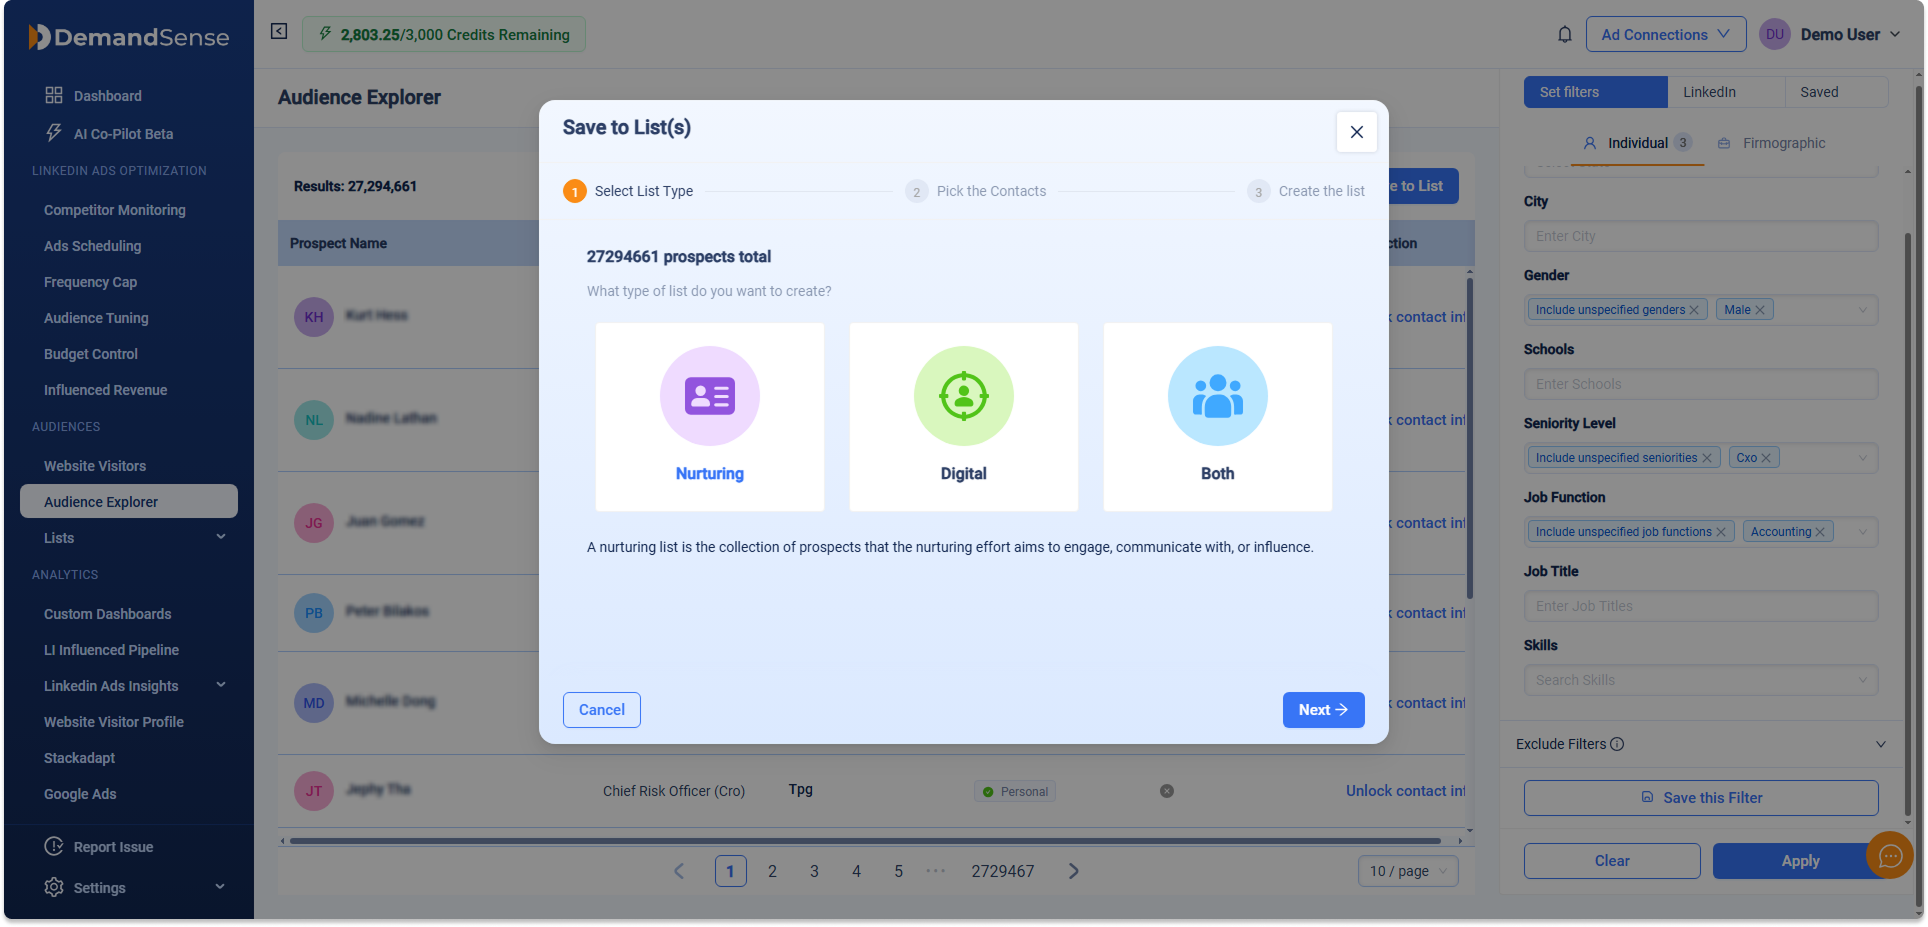
- Choose list type
- Nurturing List—Ideal for personalized outreach; costs 0.25 credits per contact. Digital List—Perfect for ad targeting; costs 1 credit per 10 contacts. Both—Saves to nurturing and digital lists; uses the higher rate (0.25 per contact).
- Select contacts
Choose bulk quantity (up to your total results, including any prior unlocks), manually unlocked ones from this search, or combine both. Built-in checks ensure valid numbers—no zeros, no overages. - Select or create list(s)
Pick one or more existing lists, or create new ones on the spot. Click Save to finalize. The system saves your applied filters, the displayed contact IDs, and their order for future reference.
It shows credit costs upfront and warns you if you’re short. When you finish, the filters, shown contacts, and their order are saved along with the prospects.
Viewing and Managing Lists #
Navigate to Lists in the menu (right below Audience Explorer) to see your collections:
- Nurturing Lists—Full-profile prospects suited for direct engagement and outreach.
- Digital Lists—Basic-profile prospects optimized for ad platforms and broader targeting.
The special Revealed Contacts list sits pinned at the top of Nurturing Lists. It automatically collects every prospect you unlock in Audience Explorer—perfect for quick access and adding to campaigns.
That’s the core flow! Start simple with a few filters, apply, unlock what you need, and save to lists so you can activate them in campaigns right away.